Branding your Chat Box Widget

Mathew
Last Update 2 bulan yang lalu
All websites created through Kaydoh include a chat box by default. You can customize the chat box from your account settings, including the greeting message, email capture behavior, and quick reply buttons that help visitors contact you without typing. See tutorials below.
💡 Want to turn off the chat box entirely?
- To disable chat on a specific page only: How to Turn Off Chat (Website Level)
- To disable chat across your entire account: How to Turn Off Live Chat (Account Level)
What do you need?
- A computer or laptop with access to your Kaydoh dashboard.
What to do?
- Watch (duration: 5 minutes)
- Read ( step by step )
Watch – Tutorial ( 5 minutes)
(duration: 5 minutes)
Read – Tutorial (step by step)
STEP 1
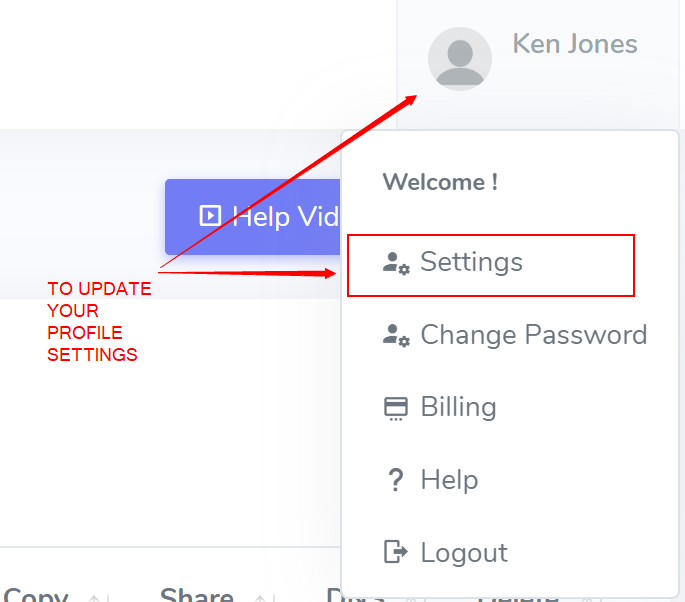
Click your profile icon in the top right corner of the dashboard and select Settings.
STEP 2
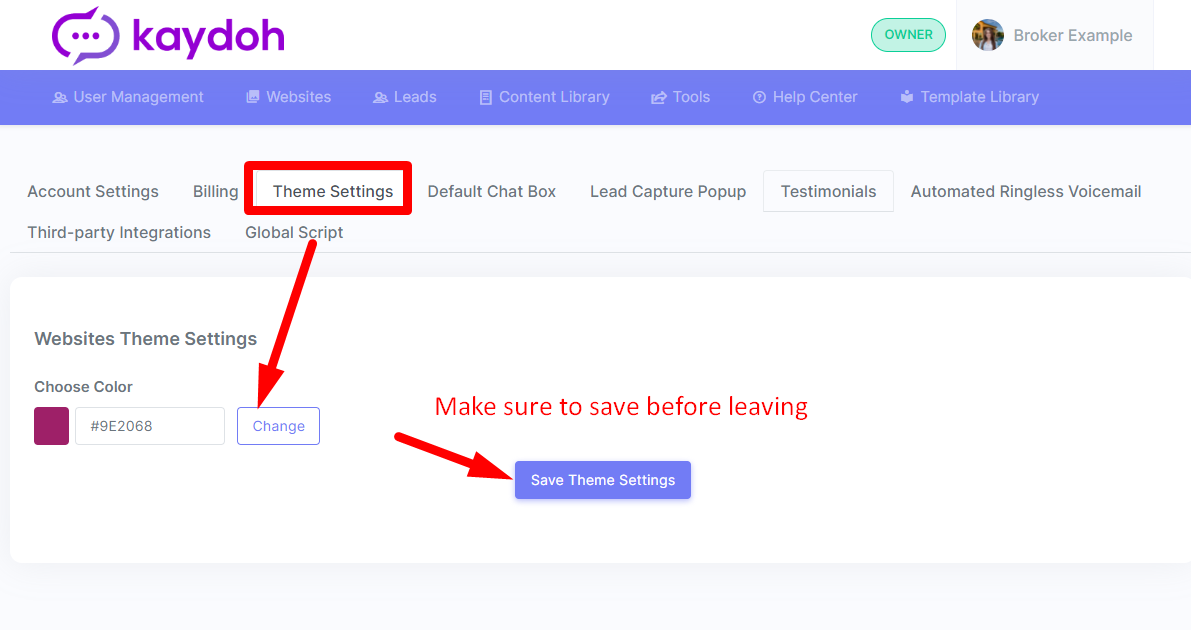
Open the Theme Settings tab and click Edit to begin customizing your chat box.
STEP 3
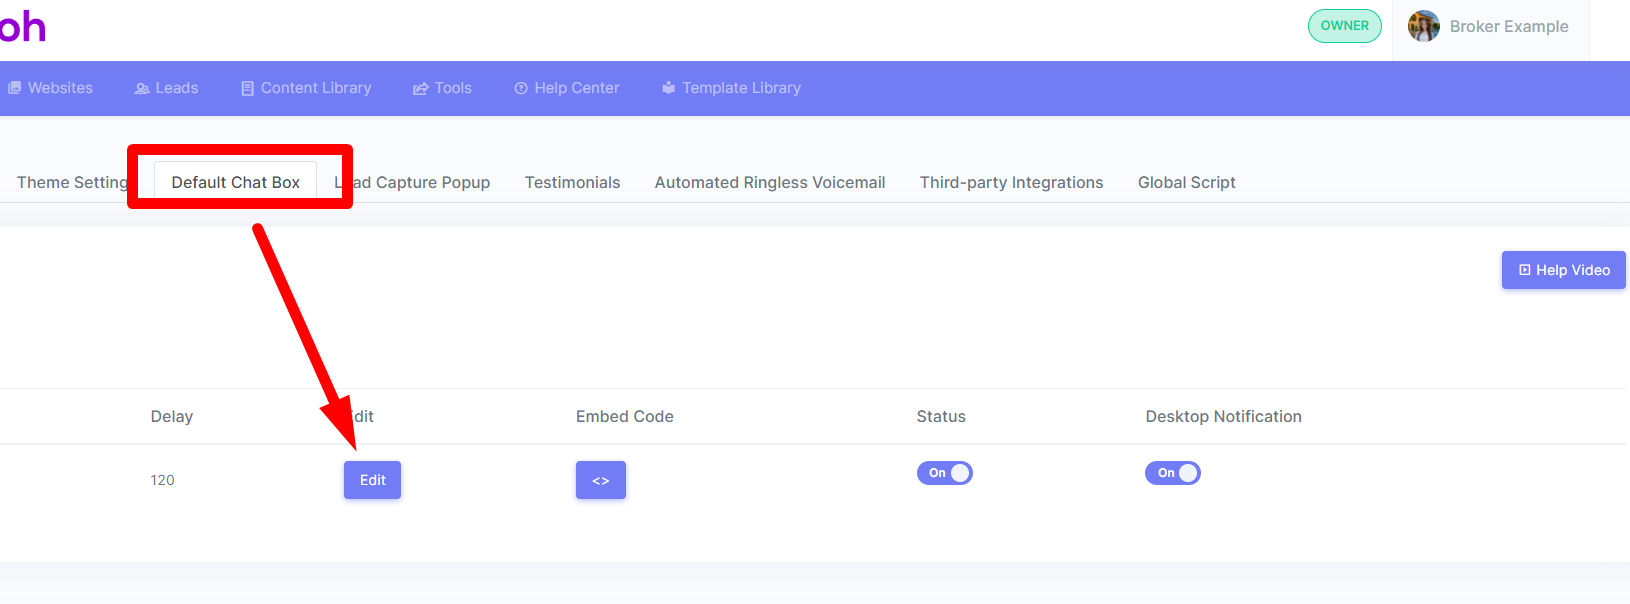
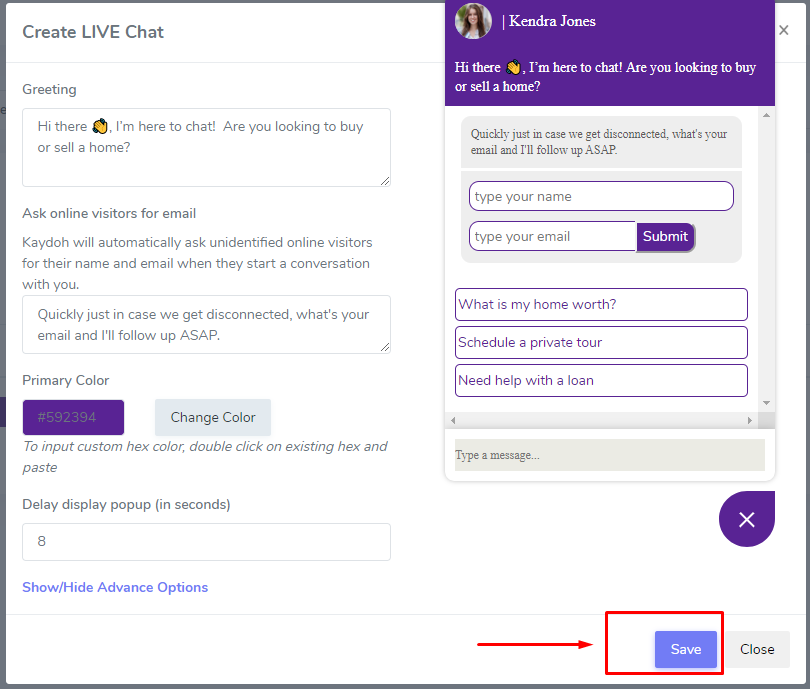
Go to the Default Chat Box section to start editing the chat box widget shown on your websites.
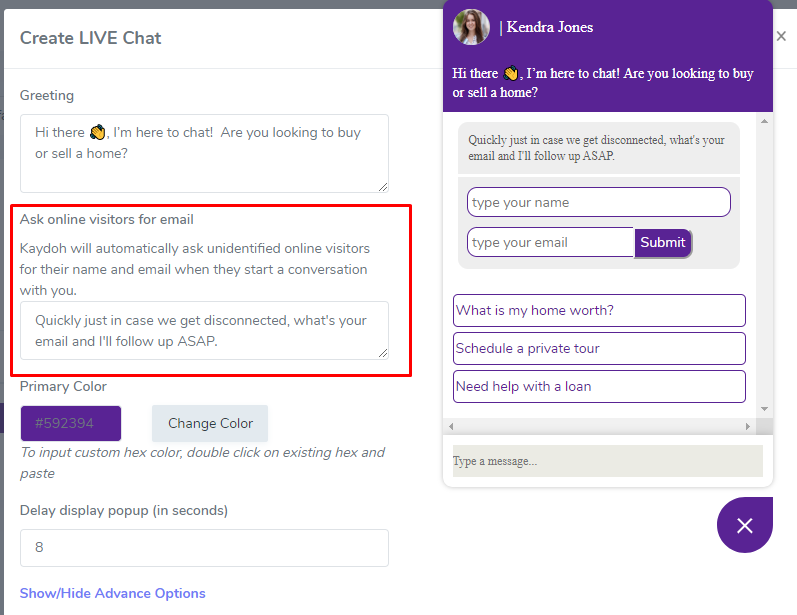
- Greeting
This message appears when a visitor opens one of your Kaydoh websites and sees the chat box.
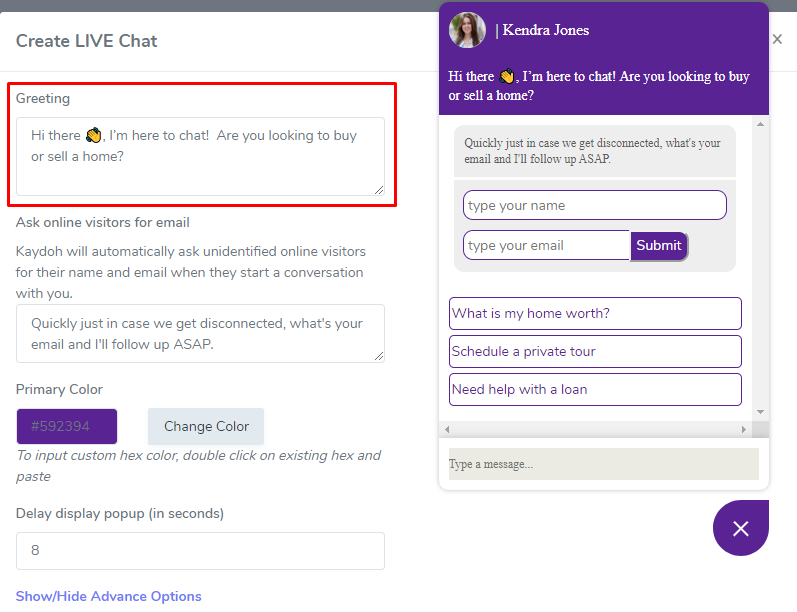
- Auto Email Capture
Kaydoh prompts visitors to share their email when a chat conversation starts. You can customize the message to match your brand voice.
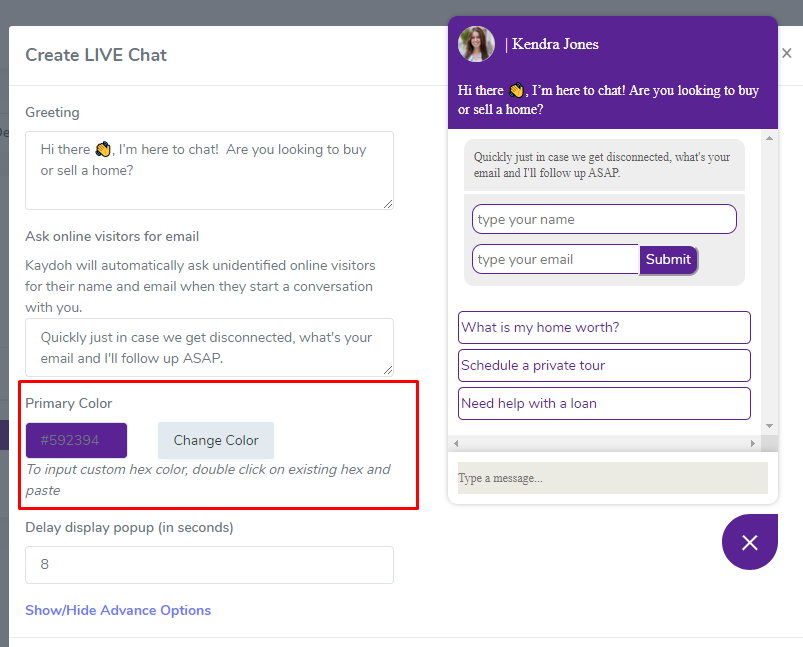
- Theme Color
Use the Change Color option to select a color that matches your brand. You may also enter a specific HEX color code if needed.
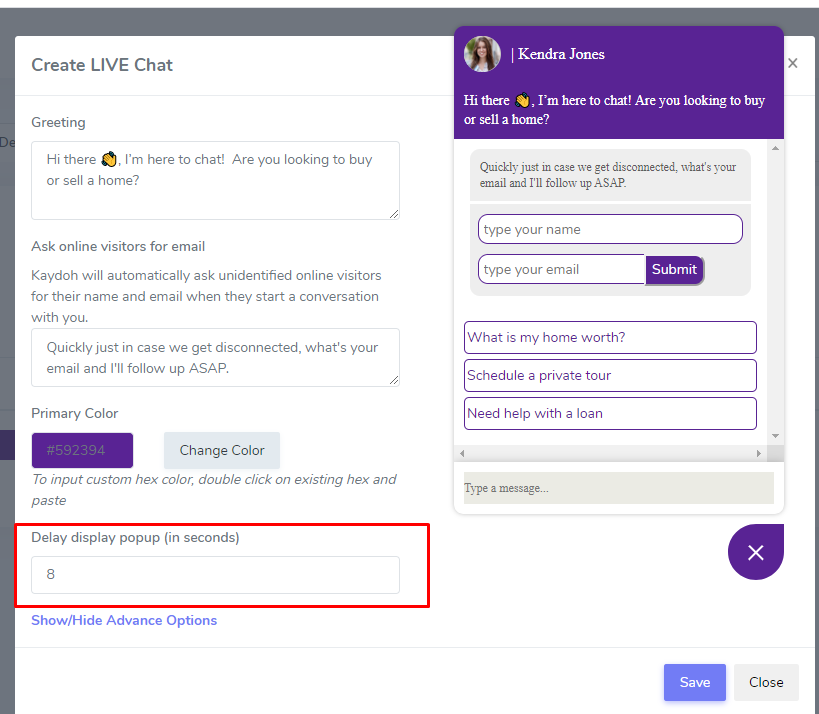
- Chat Box Popup Delay
This setting controls how long the chat box waits before appearing to a visitor. The default delay is 8 seconds and can be adjusted based on your preference.
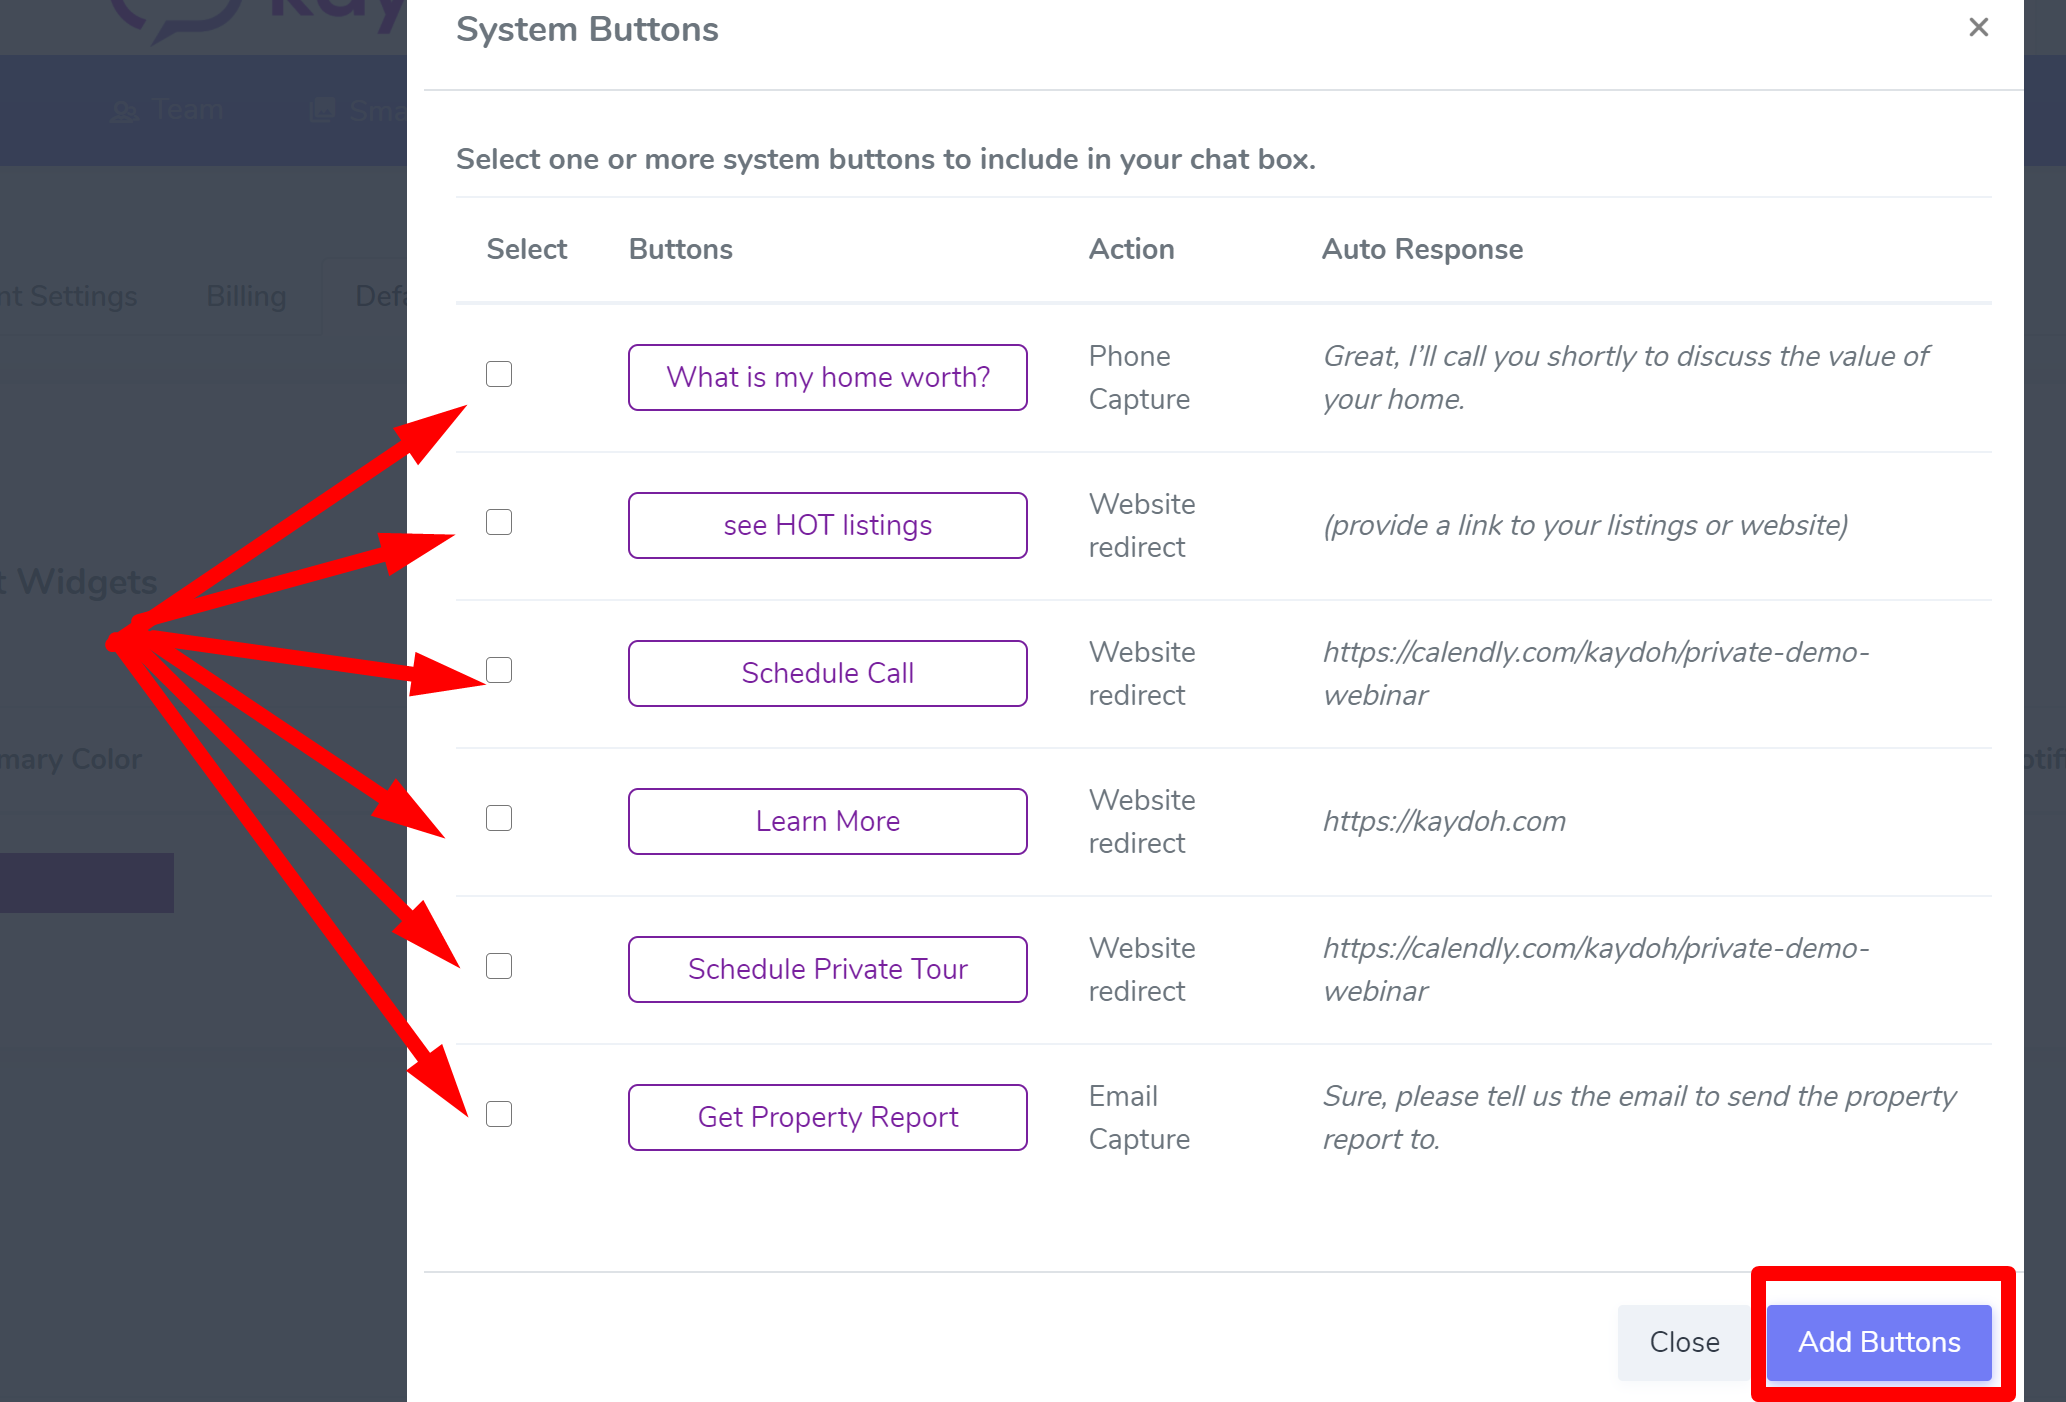
- System Buttons
System buttons are pre-made buttons that can be added to your chat box. These buttons may include scheduling links such as Calendly. Select one or more buttons, add them, and click Save to apply the changes.
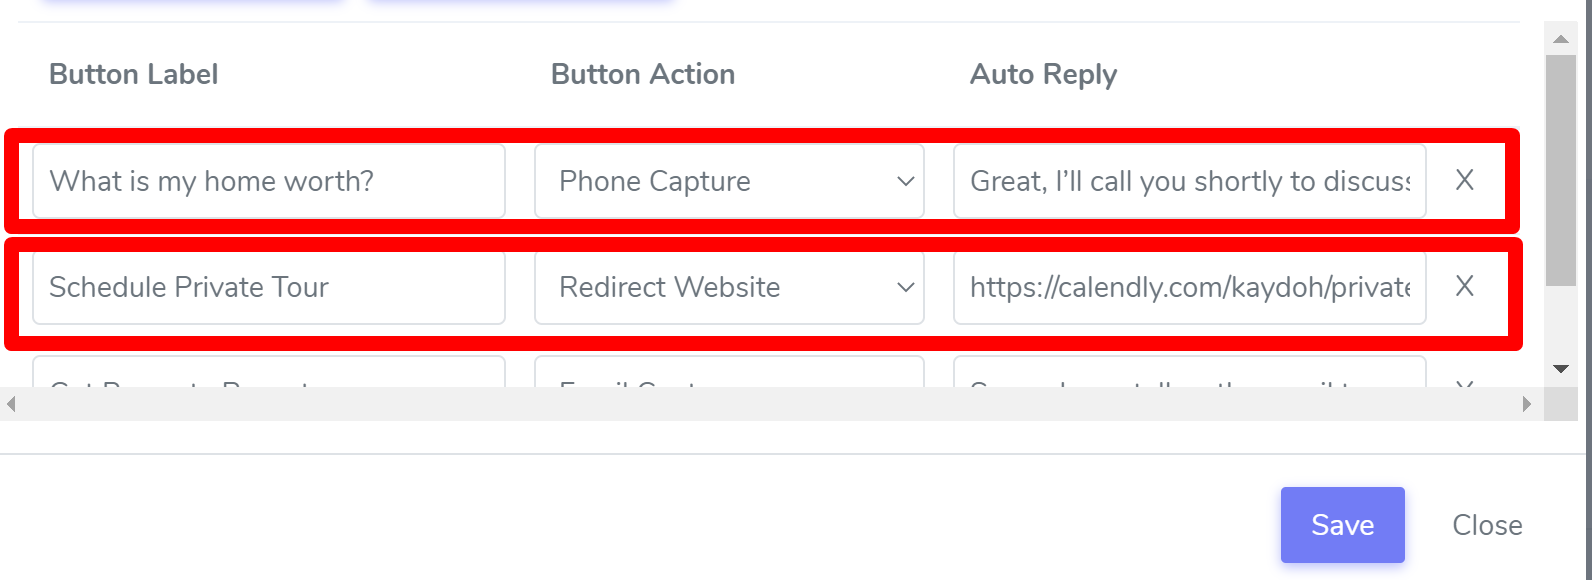
- Custom Buttons
Custom buttons allow you to define the button label, action, and automatic reply shown to visitors.
- Button Label:This is the message the Visitor sends to you.
- Button Action:What to do when Visitor clicks on the button labels.
- Email Capture : Asks for Name and Email
- Phone Capture : Asks for Name and Phone
- Redirect Website : Direct visitor to a website.
- Auto Reply - This is your response to the visitor when the button is pressed. For example, “Sure, we can help. Enter your info below and someone will reach out shortly.“
If the action is a “Redirect Website”, then instead of putting a custom response, just put in the actual website you want visitor to navigate to.
Step 4 – FINISH
When you are finished customizing the chat box, click Save to apply your changes.
Internal tags
- Can I edit the chat box
- I want to change the chat box functions
- Add new options to chat box
How can I brand my chat box widget?
What are the steps to customize the branding of my chat box widget?
How do I personalize the design and branding of my chat box widget?