How to Setup Page Expiration
Expiring a Kaydoh Page

Mary Smith
Last Update 2 months ago
There are times when you are sending important information that should not be made public for an extended period of time. A great way to control this is by applying when the page will expire and prevent access to page.
What do you need?
- Computer
What to do?
- Watch Video Tutorial ( 2 min )
- Read ( step by step )
Watch - Video Tutorial ( 2 minutes )
Read - Tutorial (step by step)
Step 1
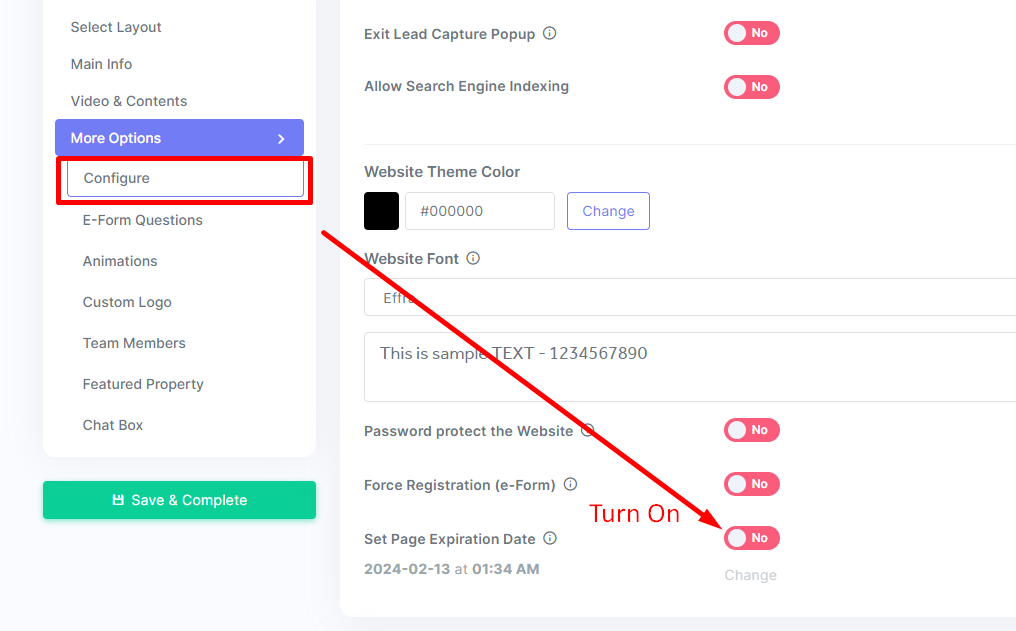
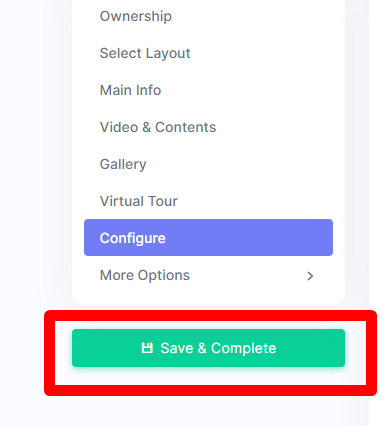
Edit your page and switch to Advanced Mode using the toggle at the top of the editor. Navigate to More Options → Configure and toggle on Set Page Expiration Date.
⚠️ If you don't see the Configure tab or the expiration toggle, make sure you are in Advanced Mode — it is not visible in Easy Mode.
Step 2
Click on the link "Change" to update the expiration date. By default, the moment this is turned on, the page expires 1 hour from update.

Step 3
To customize the expiration date, you have two ways of doing this. The first option is to set the expiration date based on the number of minutes/hours/days from current time.
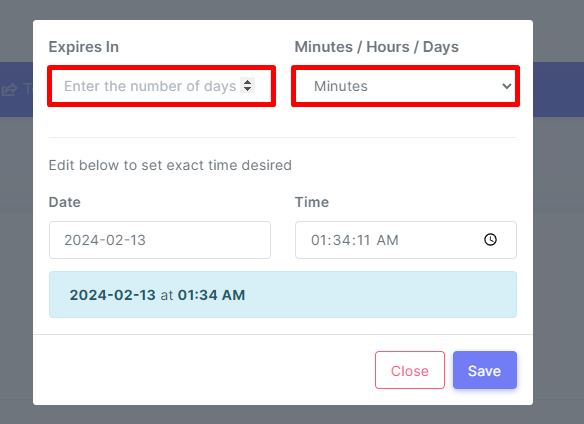
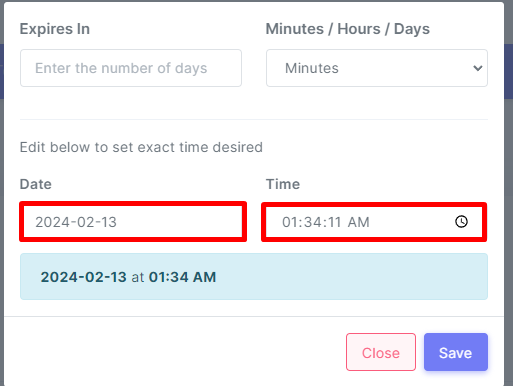
The 2nd option is to explicitly set the exact Date and Time of expiration. Expiration dates are always set using the Users local time zone.
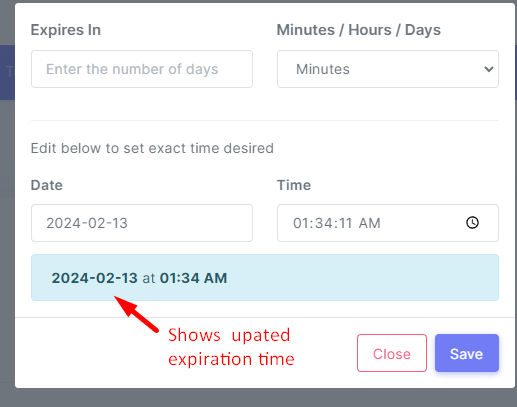
As soon as information is updated, the expiration date will reflect accordingly.
Step 4
Don't forget to finalize the changes, you need to click on the green button "Save & Complete" to apply changes.
What do visitors see when a page expires?
Once a page reaches its expiration date and time, visitors who attempt to open the link will see a message indicating the page is no longer available or has expired. They will not be able to access any of the page's content.
To reactivate an expired page, go back to Edit → More Options → Configure, update the expiration date to a future date or toggle off the expiration entirely, and click Save & Complete.
internal tags
customize expiration date
expiration date kaydoh page
set page expiration date
how to schedule expiration
expiration page
expire
page expiration
how to control the expiration date on kaydoh page
expire a page
expiration date of page
set expiration page
How can I configure page expiration?
What are the steps to set up page expiration?
How do I enable page expiration on my site?