How to add CALENDLY

Mathew
Last Update 2 mesi fa
Calendly helps you automate booking by letting prospects and clients schedule tours, listing appointments, or calls directly on your calendar — no back-and-forth emails needed.
In Kaydoh, your Calendly link can be used in two places:
- Account Settings (this article) — saves your Calendly link globally so it auto-populates in your Primary and Secondary action buttons on new pages
- Per-page buttons — add or override Calendly on individual pages directly from the page editor
Not sure where your Calendly link is? See: How to find my CALENDLY Link
What do you need?
- Computer
- Access to your Dashboard
- Access to your Calendly Link
Basic Tutorial (video)
(duration: 3 minutes)
Tutorial (step by step)
STEP 1
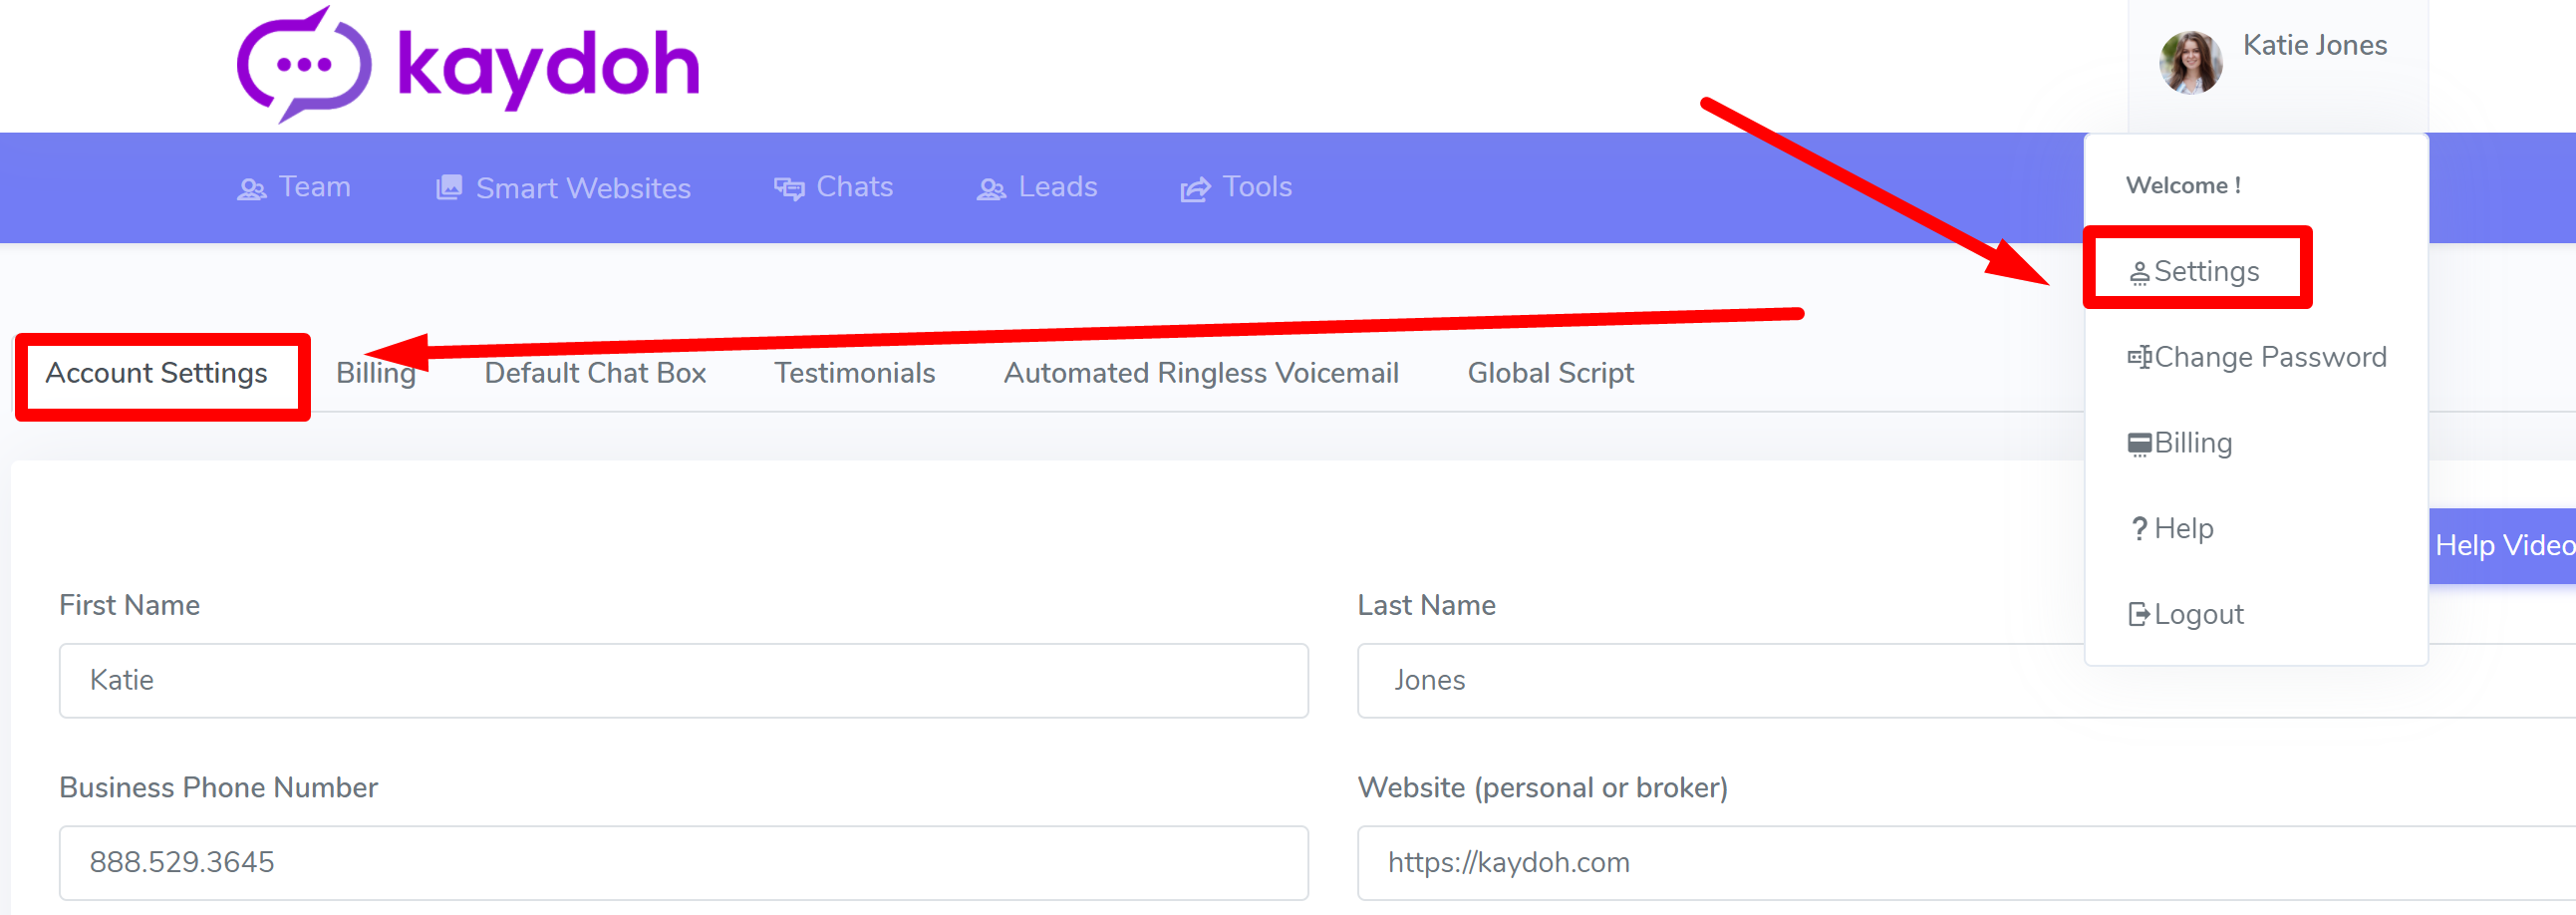
Go to your dashboard’s Settings >> Account Settings
STEP 2
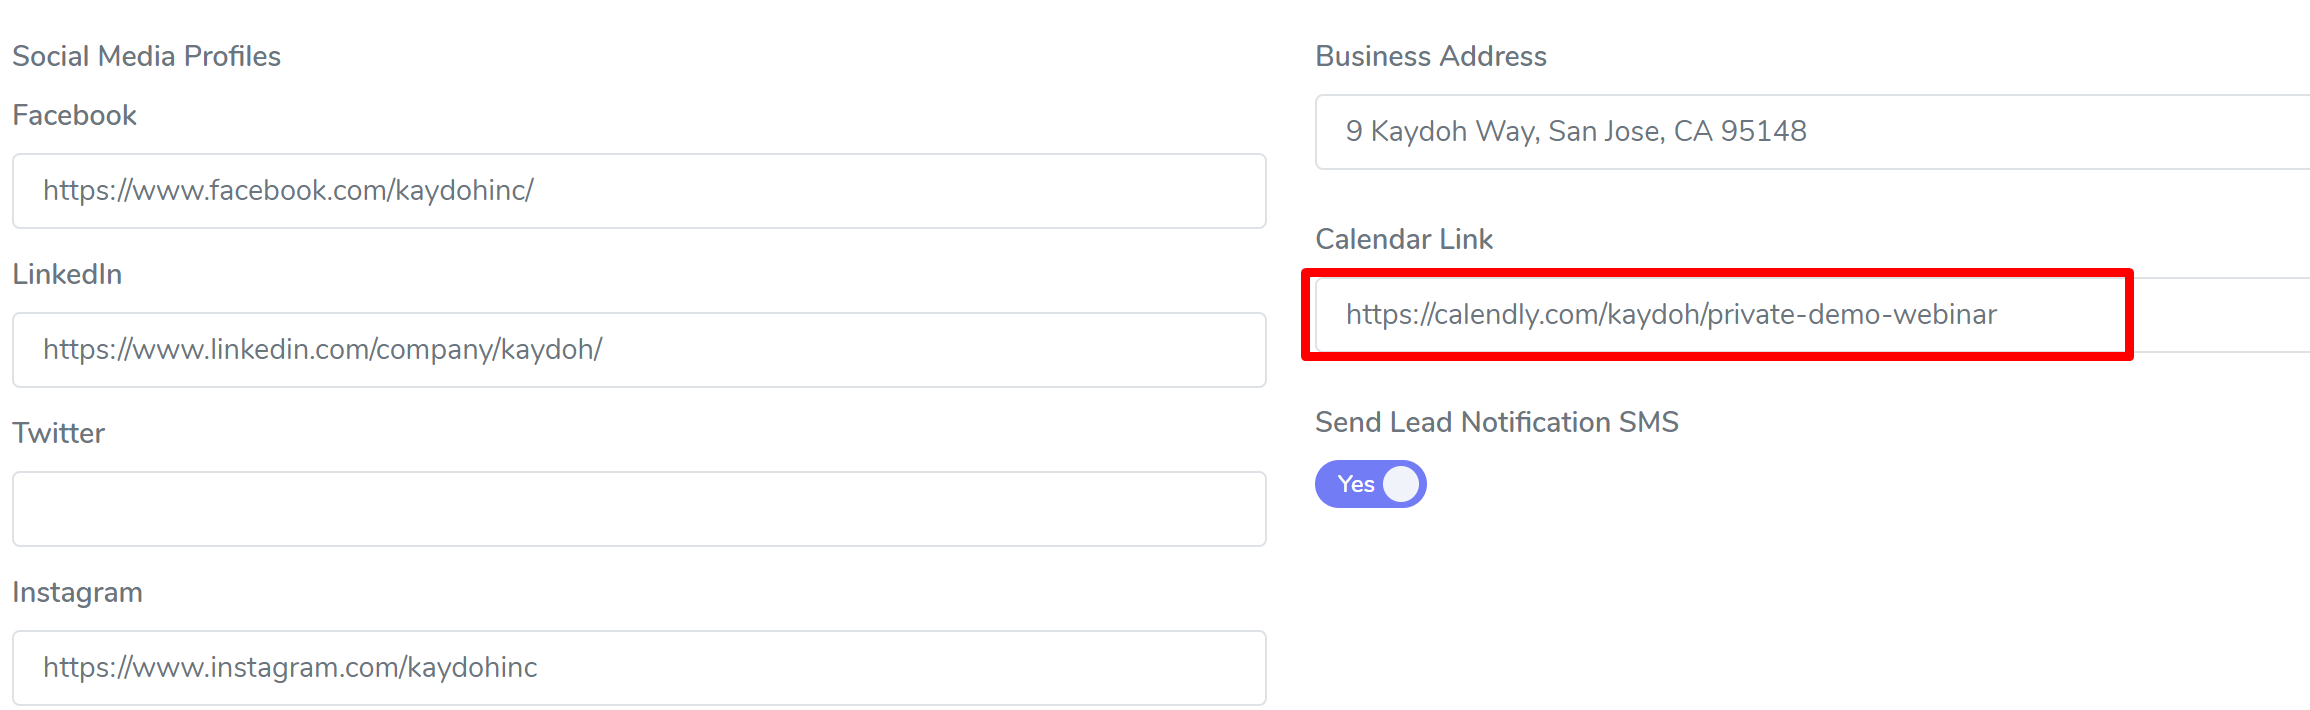
Navigate to the right column, scroll down toward the bottom to find the field, “Calendar Link”. Here is where you add the Calendly link provided to you by Calendly.
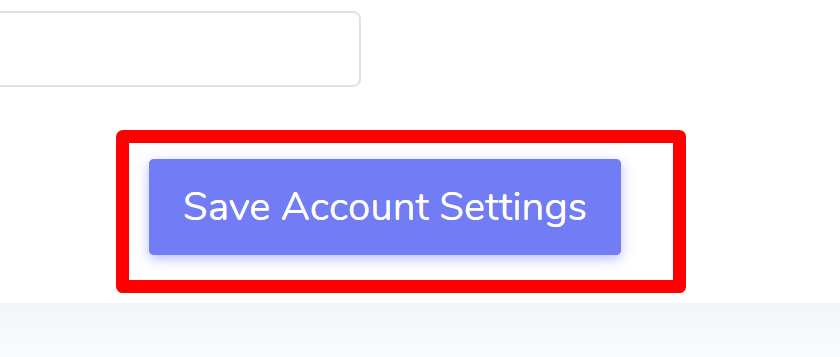
STEP 3 – Final Step
Once saved, your Calendly link will automatically be used when visitors click your Primary or Secondary action buttons on any new pages you create. To add Calendly directly to specific page buttons, see: Adding Calendly to your Primary and Secondary action buttons
Internal tags
- Can I add calendly
- Steps to add calendly
- Does calendly is available in the website
How can I add Calendly to my website?
What are the steps to integrate Calendly into my page?
How do I embed Calendly on my website or platform?