How to integrate with ZAPIER

Mathew
Last Update 2 mesi fa
Connecting Kaydoh to Zapier allows you to automatically send leads from Kaydoh to thousands of apps — including Mailchimp, Google Sheets, Slack, CRMs, and more. Every time a new lead comes in through Kaydoh, Zapier can trigger an automated action in another tool without any manual work.
This article walks you through connecting Kaydoh to Mailchimp as an example — but the same steps apply to any Zapier-supported app.
What do you need?
- Computer
- Zapier account (free or paid version)
- Kaydoh Account (sign up here)
Basic Tutorial (video)
Tutorial (step by step)
STEP 1
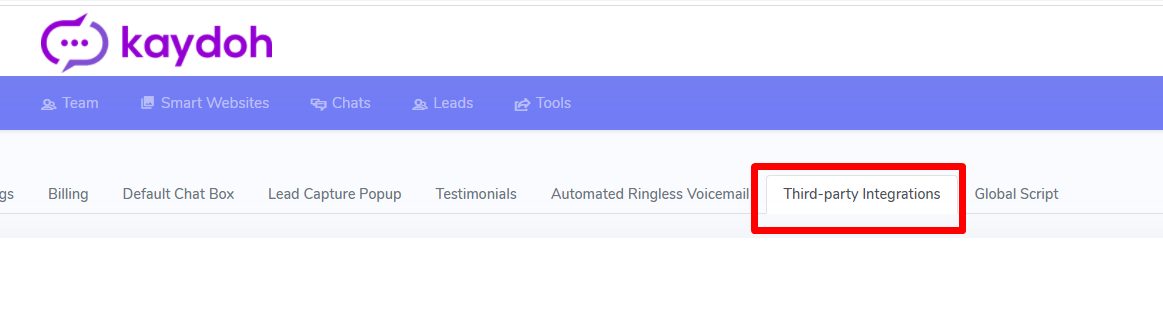
Go to your Kaydoh dashboard, under “Settings” below your Profile icon. There navigate to a tab named “Third-party Integrations”
STEP 2
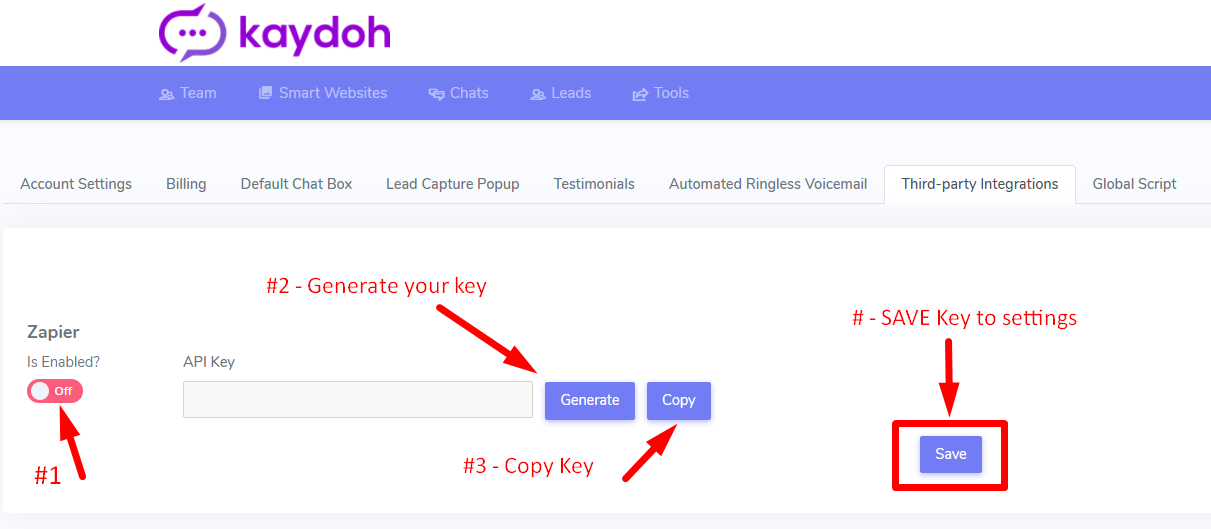
If you’re account allows 3rd party integration you’ll be able to toggle on/off the integration.
- Toggle on Zapier integration
- Hit, [Generate], to make an api key
- Hit, [Copy] to copy the api key to your clipboard.
- Hit, [Save] to ensure API Key is saved to settings.
STEP 3
Log into you Zapier account. Click on “+” sign to expand out to see the “Make A Zap” button

STEP 4
Search for the “kaydoh” app.

STEP 5
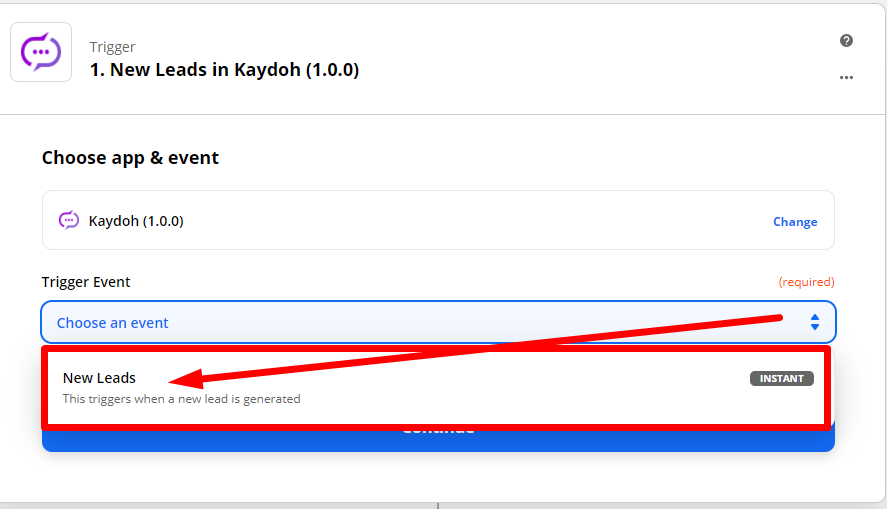
Select the trigger event, “New Leads”, then hit, “Continue” to move to next step
STEP 6
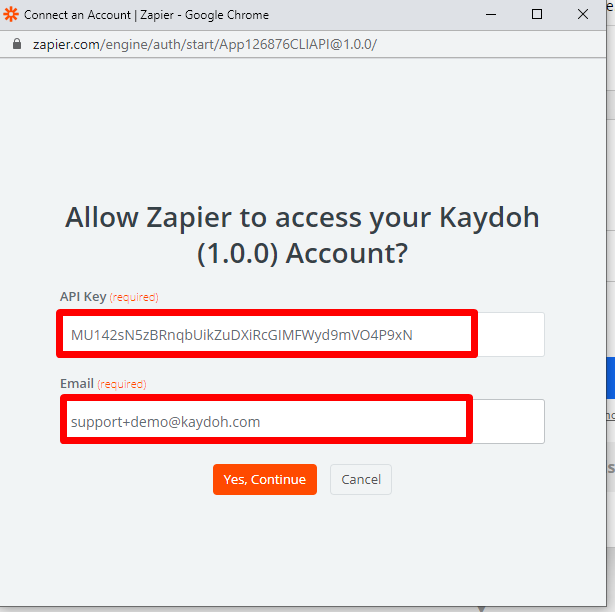
Click “Sign in to Kaydoh” to paste in Kaydoh’s API Key and your Kaydoh account’s email.
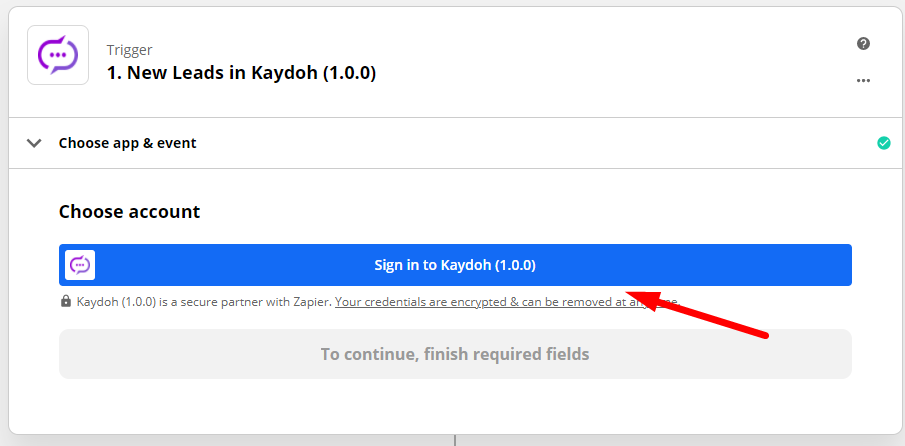
STEP 7
Click “Sign in to Kaydoh” to paste in Kaydoh’s API Key and your Kaydoh account’s email. After pasting the values, hit, “Yes, Continue”, and click “Continue” to move on to the next step.


STEP 8
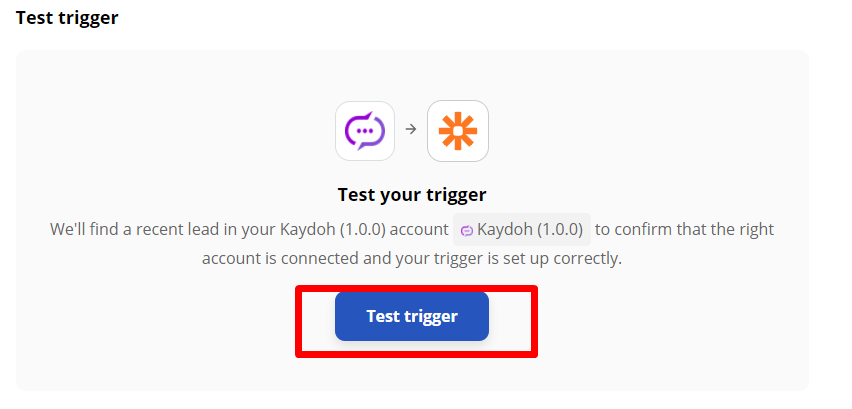
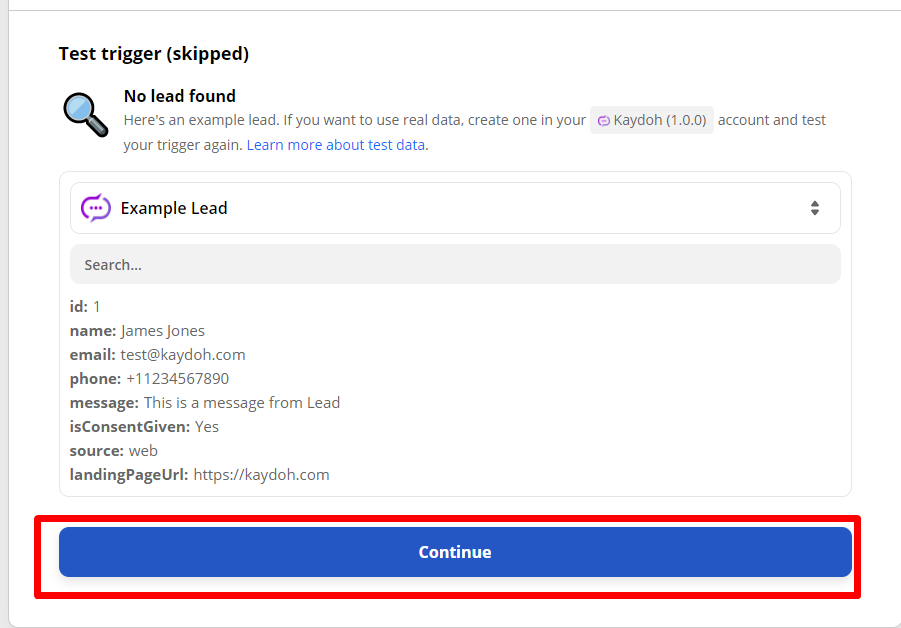
Click “Test trigger” for Zapier to look up any existing leads you may have in Kaydoh system. If any have been found you’ll be able to map those data fields to your next action. Otherwise, you may get a message saying no leads were found, which you can move on to ‘skip test’. Don’t worry about not having leads found by Zapier. You will be able to successfully setup Zapier without existing leads.
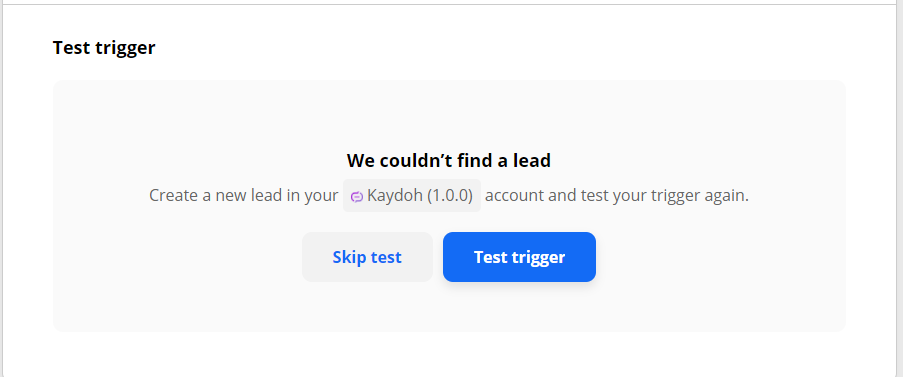
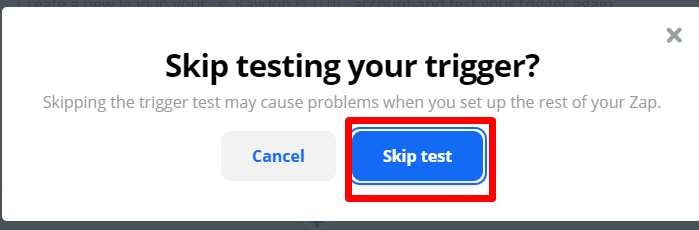
If no leads are found, click on “Skip Test”, Kaydoh will provide a sample dataset for you to use in your next step.
Move on by clicking on “Continue”
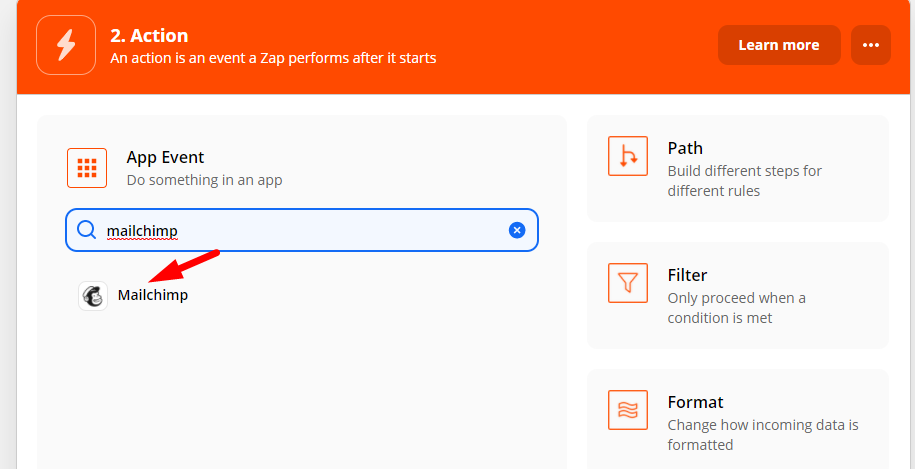
STEP 9
Search for ‘Mailchimp’ to find the integration Zapier will send leads to. This will be the destination of the lead capture by Kaydoh.
💡 Using a different CRM?
This example uses Mailchimp but Zapier supports thousands of apps. If you use Follow Up Boss, CINC, LionDesk, HubSpot, or any other platform, search for your CRM name in Step 9 instead of Mailchimp. The remaining steps follow the same pattern — connect your account and map the Kaydoh lead fields to your CRM's fields.
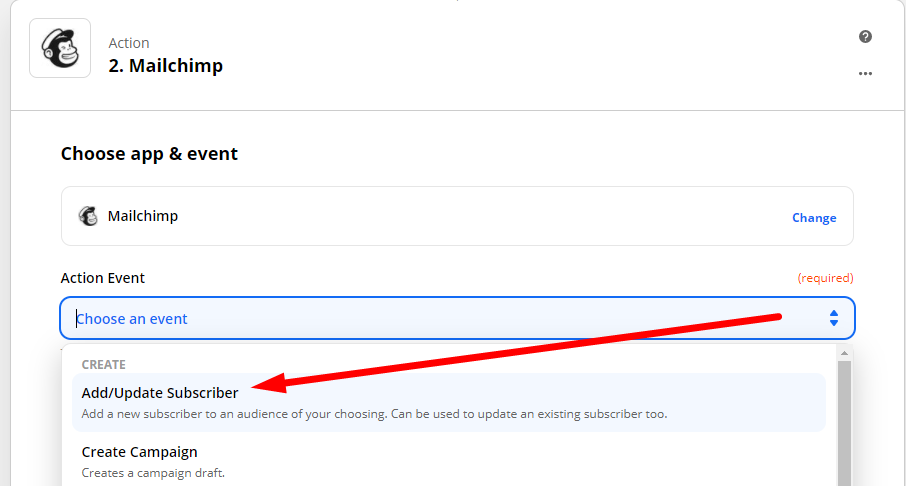
STEP 10
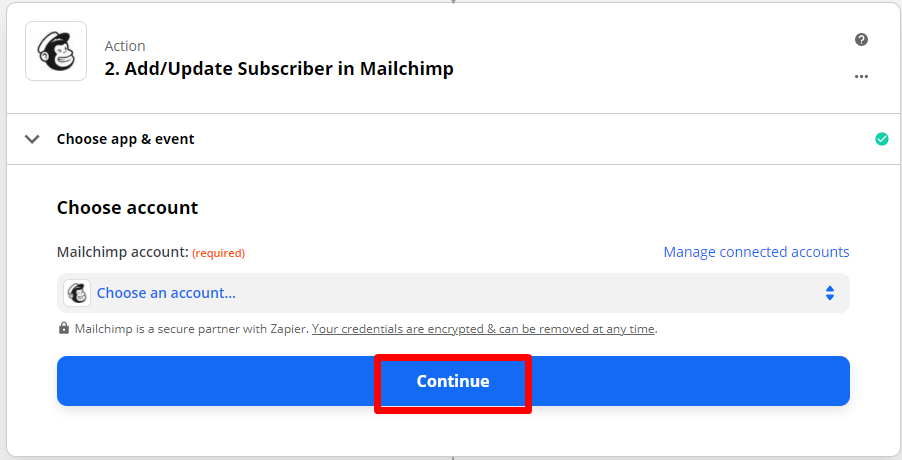
Select an event to execute when leads are sent to mailchimp. For this example, we’ll want to send to Mailchimp and create a new subscriber to an audience. Then hit, “Continue”
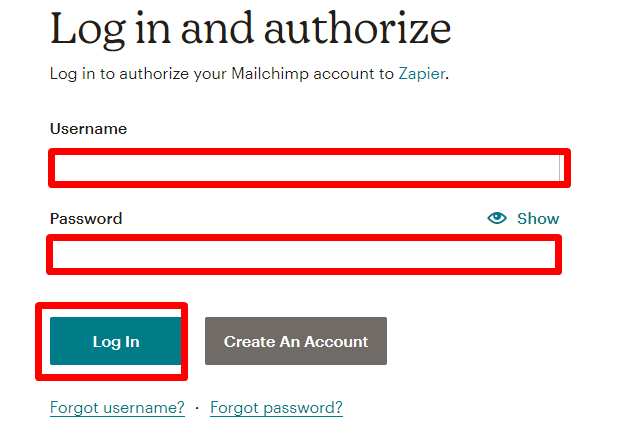
STEP 11
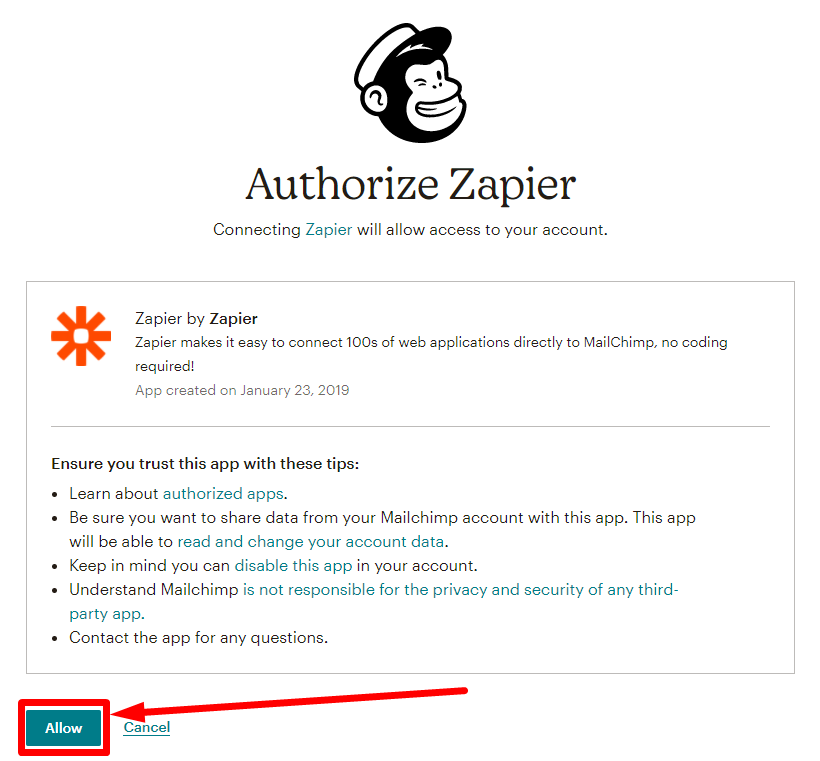
Sign in to Mailchimp to allow Zapier to gain access to your MailChimp account. Agree to authorize.

STEP 12
Select the audience of your Mailchimp account to where leads will finally land.

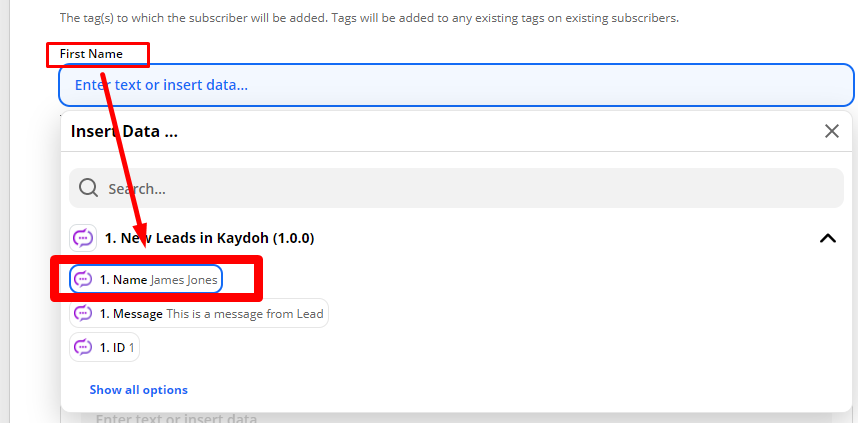
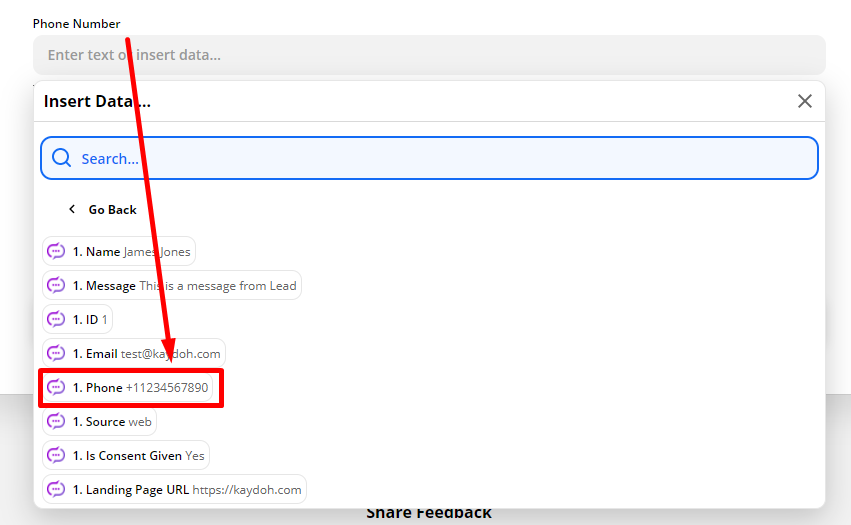
STEP 13
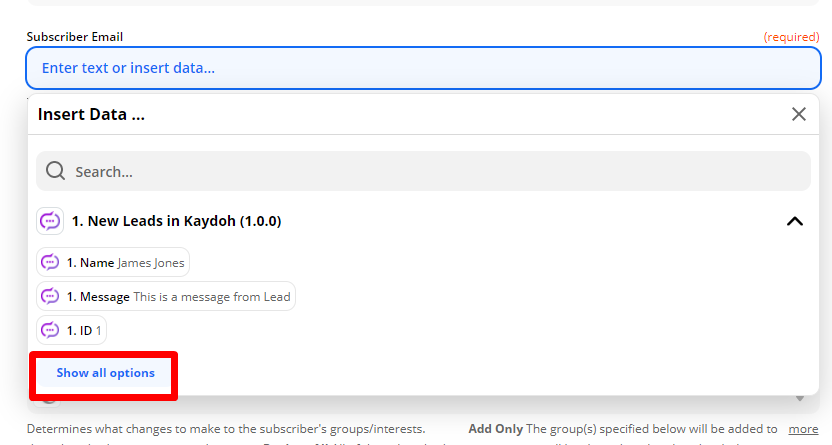
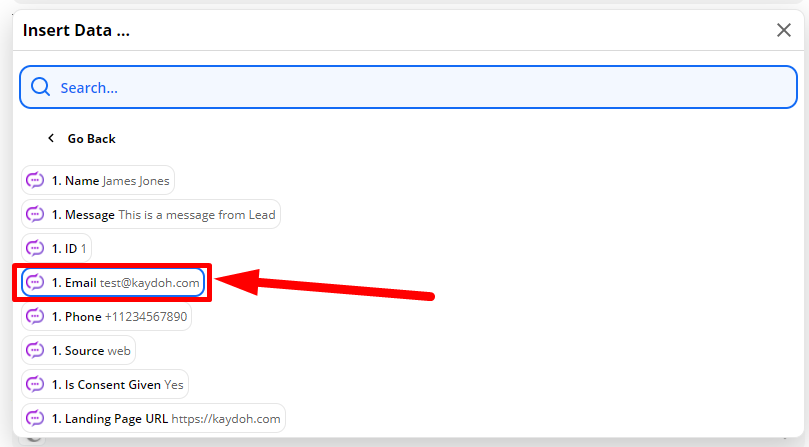
Now at this point go through each appropriate field from Mailchimp and match/map it back to Kaydoh’s input.
STEP 14
After mapping all of Kaydoh’s relevant information (not every information from Kaydoh is needed to pass over to Mailchimp)
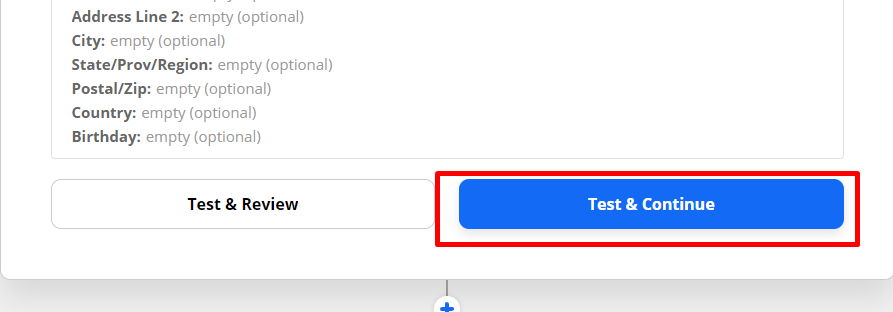
Click “Test & Continue” to finalize
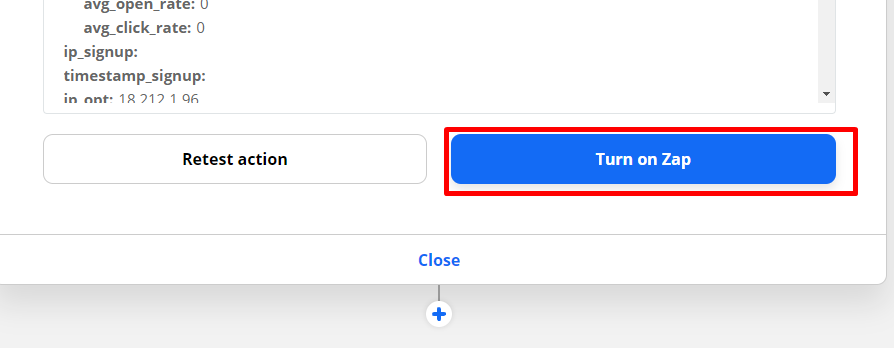
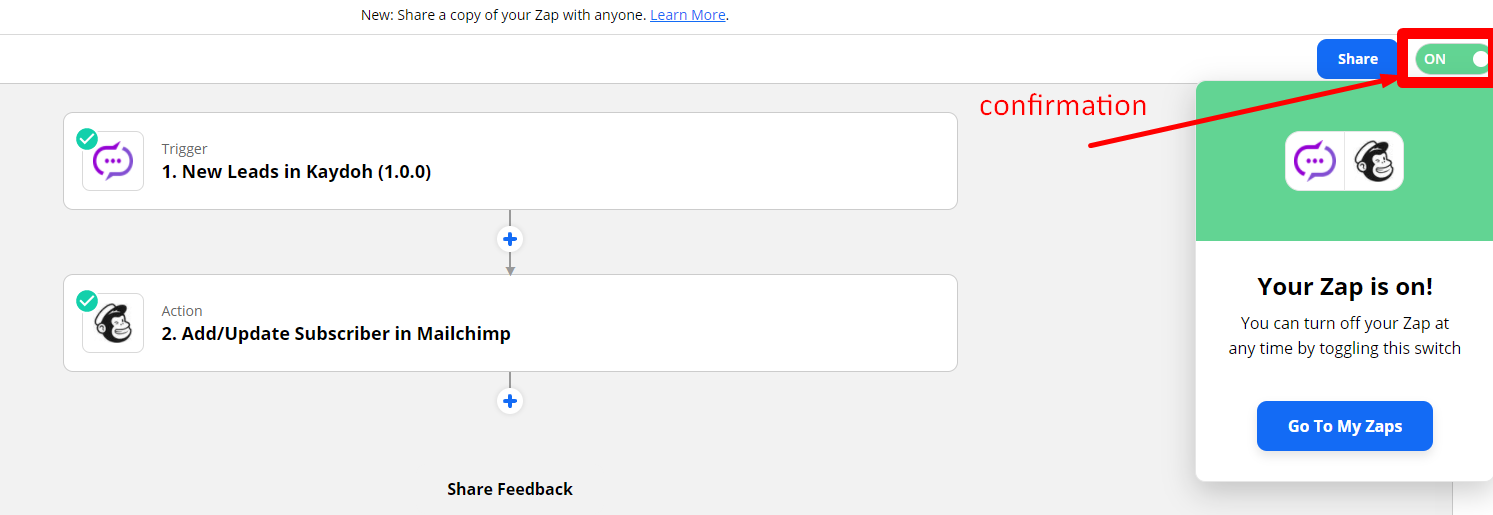
STEP 15
Last step is to turn on the Zap, confirmation when active will be shown top right as ‘on’ after clicking on the “Turn on Zap”
Internal tags
- Can I integrate with ZAPIER
- Steps to integrate with ZAPIER
- Methods to integrate with ZAPIER
- Does Zapier support
How can I integrate with Zapier?
What are the steps to connect my application with Zapier?
How do I set up an integration with Zapier?