How to setup a Zoom Registration Page - in Kaydoh
Mary Smith
Last Update a year ago
Kaydoh can create landing pages in replacement of Zoom's default registration pages. Using Kaydoh instead allows you to create more personalized registration pages with Video and delivery of content for the webinar. It's great when partnering up with other speakers/host that have their own business / content to share.
What do you need?
- Computer
What to do?
- Watch Video Tutorial ( 3 minute )
- Ready (step by step)
Watch - Video Tutorial ( 3 minutes )
Read - Tutorial (step by step)
Step 1 (for first time setup)
Before setting up a Zoom Registration Page in Kaydoh, a webinar meeting needs to already exist in your Zoom account. Go here to learn how to create a Webinar Meeting.
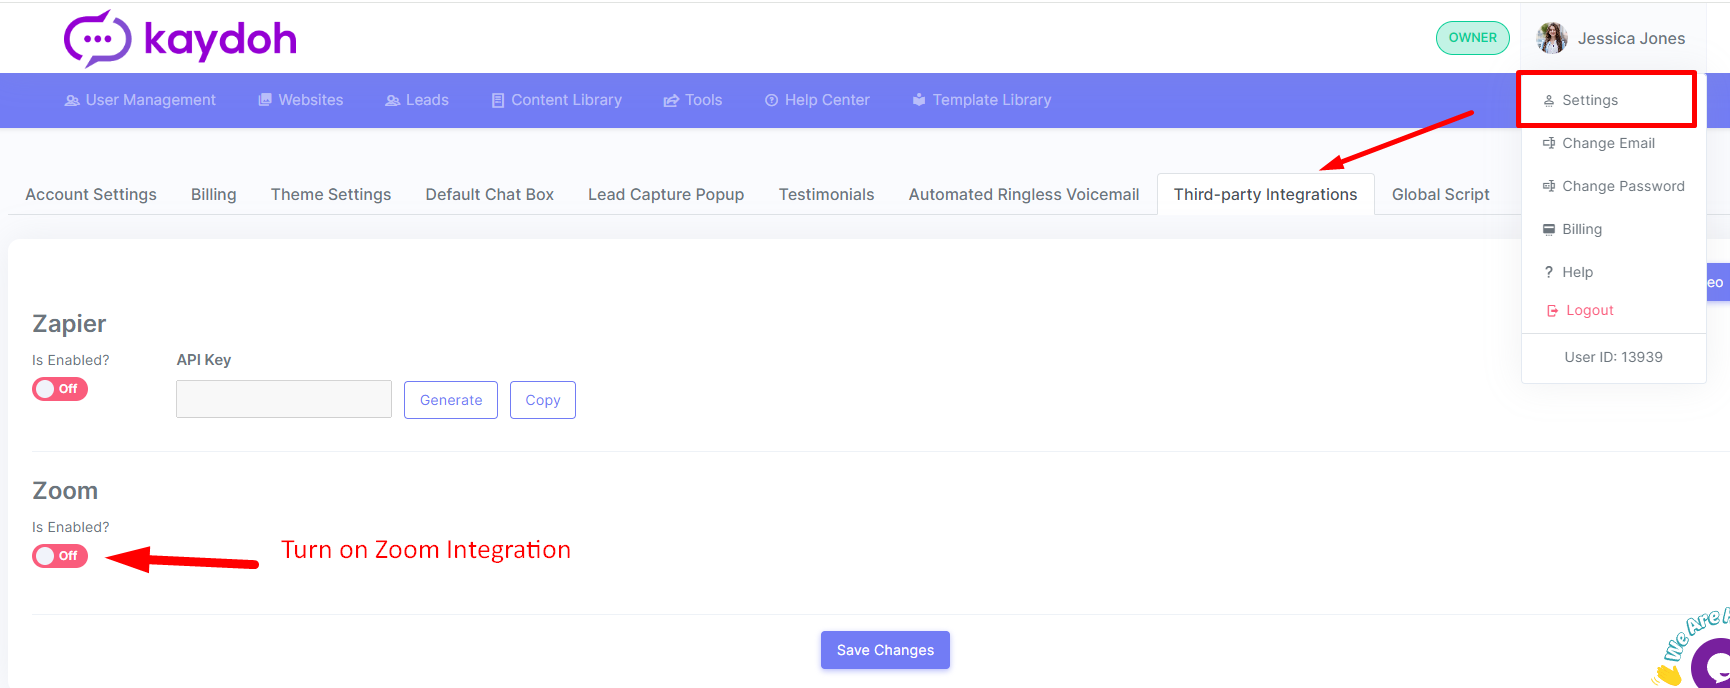
Navigate to your "Settings" > "Third Party Integration" and look for a ZOOM option to toggle on. If it is missing, it means your current plan doesn't have this feature turned on. You will need to upgrade accordingly.
Step 2 (for first time setup)
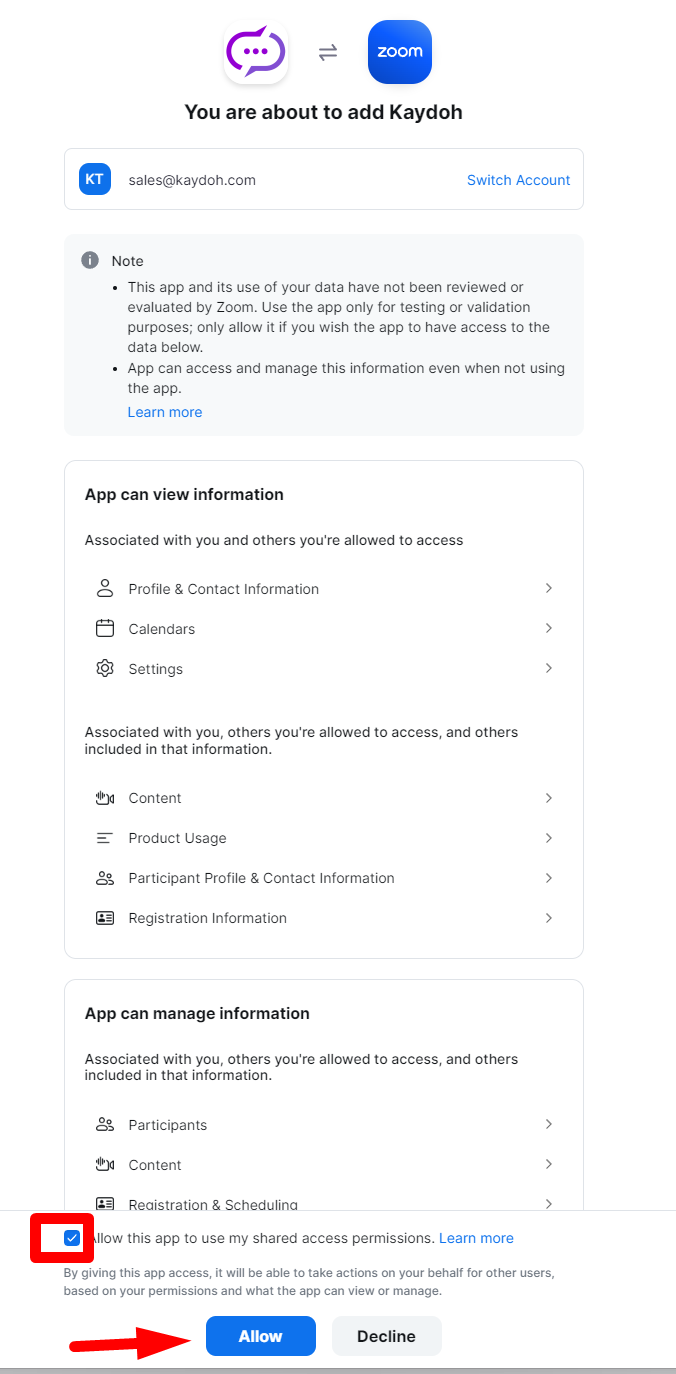
Turn on the Zoom integration, then click on "Authorize Zoom" to give Zoom access to Kaydoh.

Make sure to check mark the box, at the bottom of screen to "Allow this app to use my shared access permissions", then proceed to click on the button "Allow"
Step 3
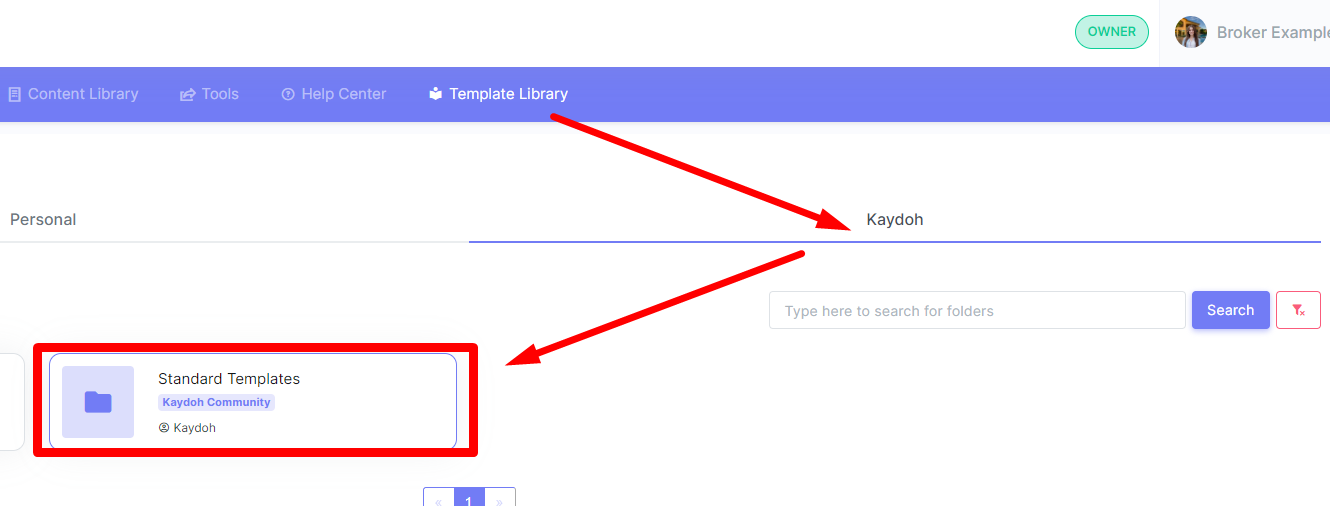
Navigate to the Template Library > Kaydoh > Standrd Templates and look for the "Zoom Registration".
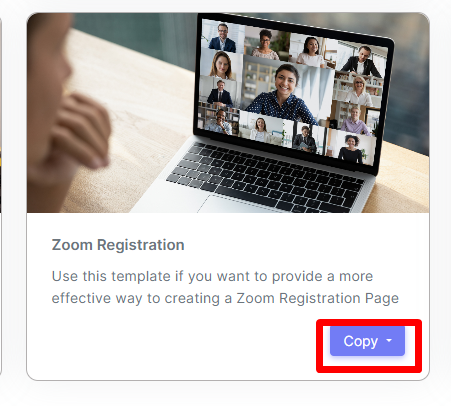
Click on "Copy" and then proceed to your main list of "Website" views.
Click on "Edit"
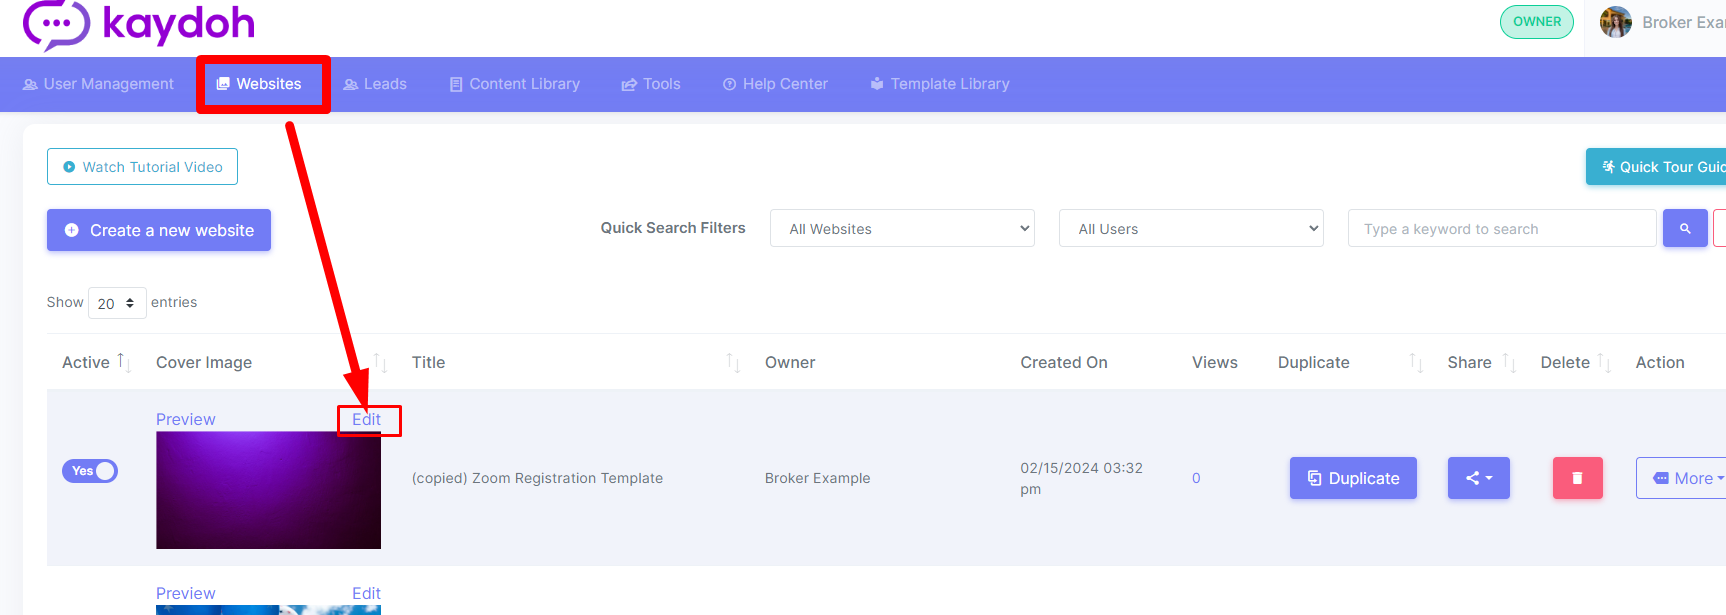
Step 4
Navigate to "More Options" > Configure tab. There you should see the option to toggle on the "Zoom Integration"
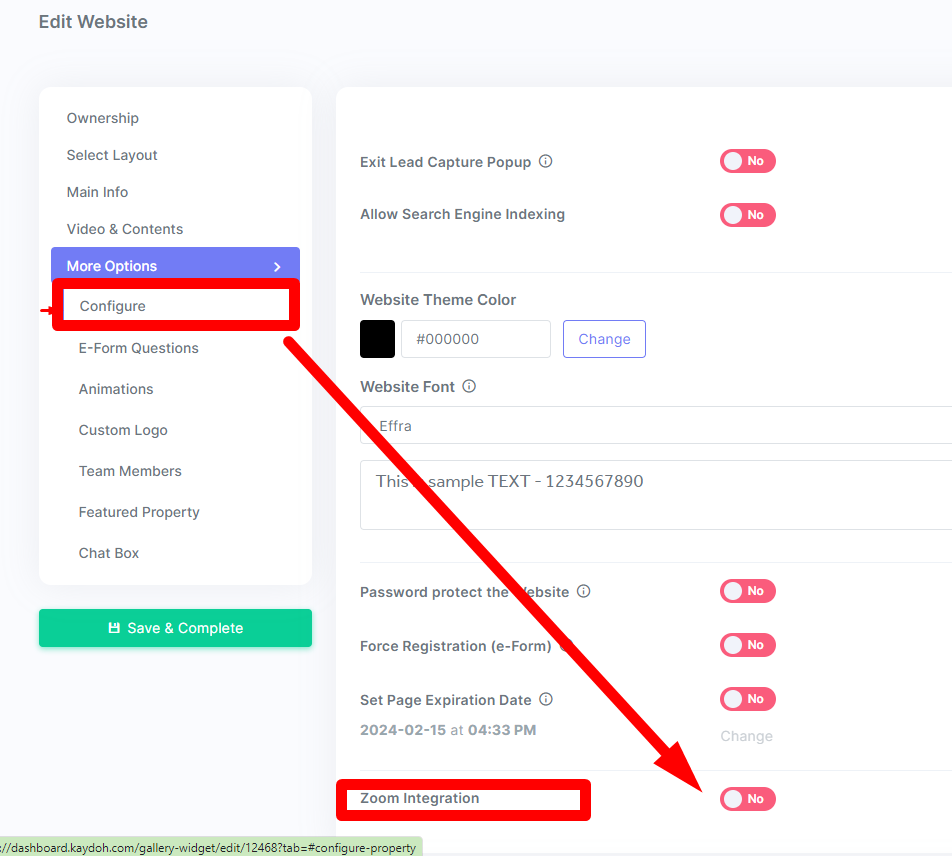
Once toggled on, click on the link: Configure

Select from drop down the designated Zoom Webinar for the Kaydoh Registration Page.
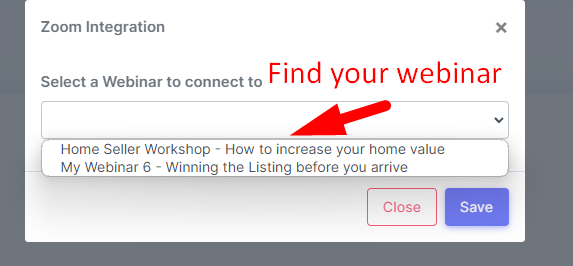
Make sure to hit "Save" to connect the Zoom Webinar to Kaydoh Page.
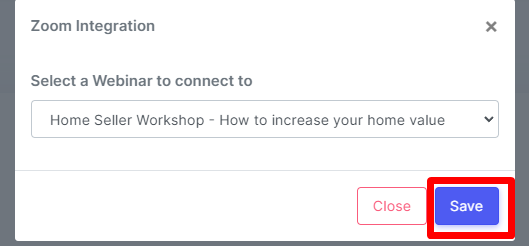
Last Step
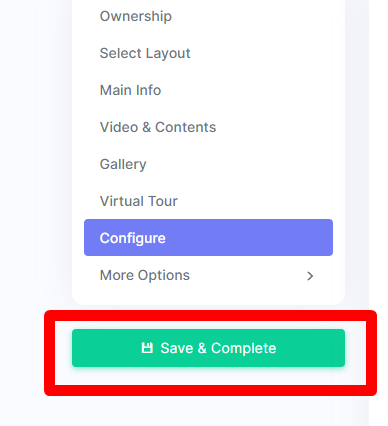
As always, don't forget to hit the green button "Save & Complete" to finalized the changes.
Creating another Zoom Registration Page
To create additional Zoom Registration Pages, repeat steps starting from STEP 3.
internal tags
zoom webinar
setting up zoom webinar
webinar meeting
zoom
How to set up a Zoom Registration Page
zoom registration in kaydoh
set up zoom in kaydoh
zoom registration in kaydoh
set up zoom registration
How can I set up a Zoom registration page in Kaydoh?
What are the steps to create a Zoom registration page in Kaydoh?
How do I configure a Zoom registration page on Kaydoh?

